Contact Orders
From time to time it is necessary for Safeguard to make contact with an individual at a property. These contact orders can be opened for the purpose of either scheduling a later give access order, or to set up a cash for keys The process by which a mortgagor is offered cash in return for vacating a property. negotiation. The Contact order is opened so details regarding these future orders can be provided to Safeguard.
Enter Contact Orders Information
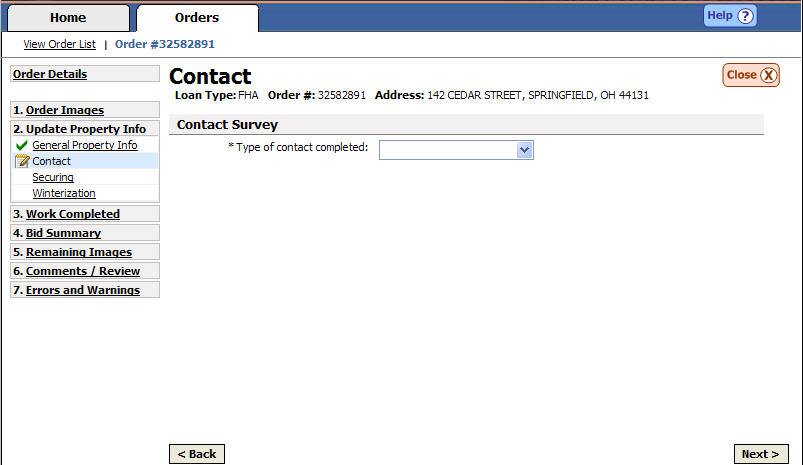
The Contact screen will display. A vendor may script contact information by answering the questions which appear on the screen and providing the appropriate information. A vendor will be given the option of entering contact information for two different types of contact orders, cash for keys negotiations or give access scheduling.

Cash for Keys Negotiation
{Type of contact completed} Choose “Cash for Keys Negotiation” from the drop down box.

{Who was access given to?} Choose “Yes” from the drop down box.

Type in the name of the person with whom the deal was negotiated.

Enter the negotiated amount for the cash for keys deal.

Enter the date of the appointment by either typing in the space provided or clicking on the calendar icon and choosing the appropriate date.

Type the time that was set for the appointment and choose AM or PM from the drop down box.

{Did you explain what is expected of the occupant?} Choose “Yes” from the drop down box.

{Did you obtain signature of the occupant?} Choose “Yes” from the drop down box.

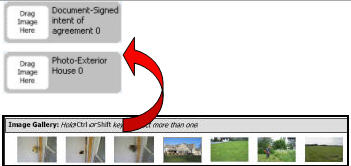
Add the required media and documentation for the contact order by dragging the media/document into the appropriate media/document box.

Give Access Scheduling
{Type of contact completed} Choose “Give Access Scheduling” from the drop down box.

{Was a give access appointment scheduled?} Choose “Yes” from the drop down box.

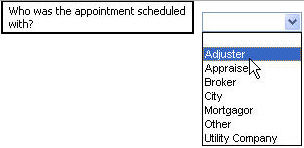
{Who was the appointment scheduled with?} Choose the appropriate answer from the drop down list.

Type the name of the person to who access will be given.

Enter the date of the appointment by either typing in the space provided or clicking on the calendar icon and choosing the appropriate date.

Type the time that was set for the appointment and choose AM or PM from the drop down box.

Related Topics
|
|
TIP: If you have additional questions, click the "Show" link in the upper left corner to view all of the help topics. |