Upload Media
Media are transmitted to Safeguard Properties through the use of the Media Uploader. Upon beginning an order, SafeView - Preserve will require that media be uploaded. These media can then be assigned to completed work and/or bids within the update.
Click
the Upload
Media link.

|
|
Many categories within SafeView - Preserve now require a "during” photo in addition to the before and after photos required in the past. |
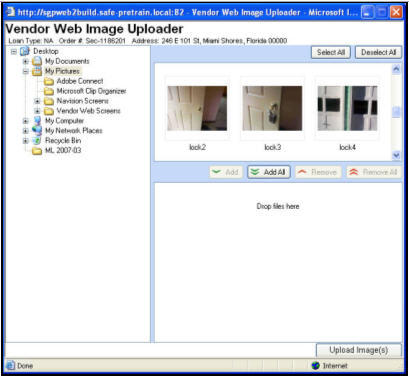
The SafeView - Preserve Media Uploader
window will appear.
|
|
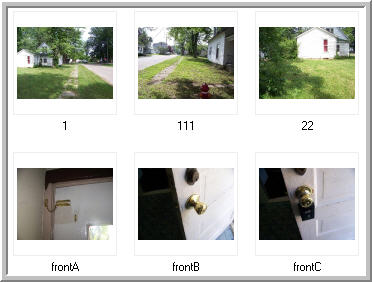
If you number your media, the Media Uploader will not sort them in numerical order (1,22, 111). Instead they will sort alphabetically (1, 111, 22).
If this causes you difficulty locating your files in the Media Uploader, we recommend you name your files with letters instead of numbers (i.e. frontA, frontB,etc.). |
|
|
|
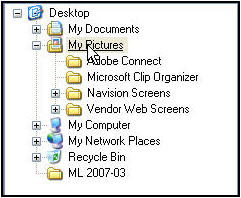
Using
the Navigation Tree on the left, click on the folder or drive containing
the files to be uploaded to Safeguard. The files contained in the chosen
folder will display on the right side of the Media Uploader window.
While
pressing the [Ctrl] button, click the media to be transmitted to Safeguard
Properties. Each selected media item will highlight in blue to indicate it
has been chosen.
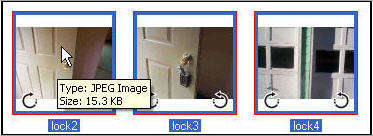
Media
which appear upside down or sideways can be rotated by clicking on the
Rotate icon located at the bottom of each media item. This must be done prior
to uploading the media to Safeguard Properties.
|
|
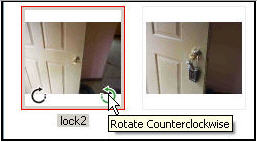
Tip: You can rotate all media at the same time by clicking the Select All button and then using the Rotate icon on any of the selected media. |
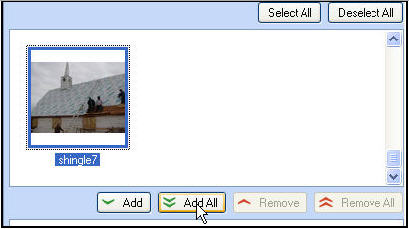
If
you want to add every media item in the selected folder to the upload queue,
click the Add All button.
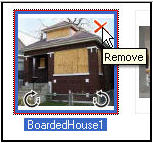
You
can remove a media item from the upload queue by clicking on the X
in the upper right hand corner of the media.
Once
you have the media you want to upload added to the queue, click on the
Upload Media button.

Select
OK from the pop-up box to confirm the quantity of media to be uploaded.

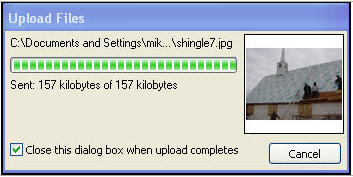
The
upload files window will appear and the green bar will track the progress
of the upload until finished. The box will close upon completion of the
upload.
Click
the next button to proceed to update the order. (You do not have to wait
for the media to finish uploading before you click the Next. Button.
The media will appear in the gallery once they have completed uploading.

Additional Media Options
At the bottom of the Media upload screen there are 3 additional headers. The Used Media header A section break used within the SafeView - Preserve program. allows you to look at the media that have already been used (assigned to labels) for the selected order.

|
|
If you receive an error A mistake on an update that must be corrected prior to being able to transmit the results to Safeguard Properties. message advising the Incomplete Media and the Incomplete Media with Labels headers display media that did not upload correctly. These media will have to be re-uploaded from labels and possibly re-uploaded prior to submitting the order to Safeguard Properties. |
Related Topics
|
|
TIP: If you have additional questions, click the "Show" link in the upper left corner to view all of the help topics. |